It’s no secret around here that I love templates, I love sharing them with you and I whole-heartedly encourage their use for super-simple digital scrapbooking.
While some readers are well-versed in the use of these time-saving files, I get asked often for more specifics on using them. This tutorial will show you step by step how to use layered template files. My example will show PSE 6 for Mac, but the steps are the same for PC versions and for Photoshop.
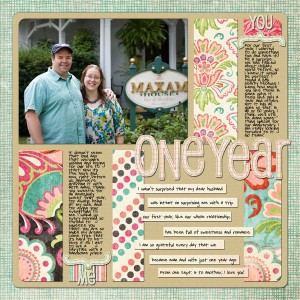
Today we’re working towards a layout that looks like this:
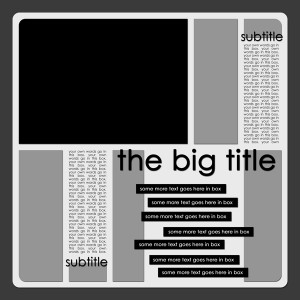
And we’ll be using the new Template Meg:
Use the template (download at the end of the post) to work along with the tutorial. Click on the screenshots to enlarge them.
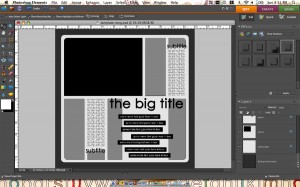
Step 1. Open the .psd file.
Step 2. Use the Move tool to select one of the shapes you want to fill. You’ll see the layer of that shape selected in the layers palette on the right.
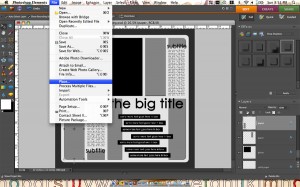
Step 3. Navigation to File>Place.
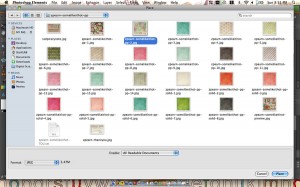
Step 4. Locate the paper you wish to use to fill the shape. Select the file and hit Place.
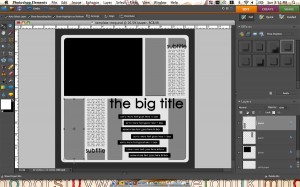
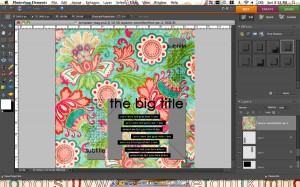
Step 5. The file will be placed into your layered template above the shape you wish to fill. However, it covers the whole page. Select Ctrl-G (Cmd-G on Mac) to clip this paper to the shape you selected. This is called a clipping mask.
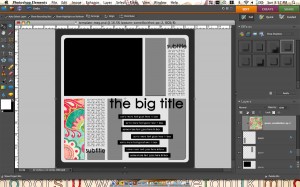
Step 6. Repeat this step will all shapes you wish to fill with papers. Edit the journaling boxes and add further embellishments as desired. Delete any placeholders as necessary.
Templates are just a foundation, a starting point; feel free to edit/move/delete shapes as you wish. Here are four more tutorials on this very same subject if you’d like some other perspectives/techniques.
- From Misty Cato
- From Paislee Press
- From TaylorMade Designs
- From Ali Edwards


Thanks for the template. i actually saw your layout last night at MSA and came over to look for it, but couldn’t find it, then it showed up in my google reader this morning!
Thank you for the template and tutorial, Jen!
Thank you for the freebie!
Thank you for both the freebie and the tutorial
Thank you for the freebie
Beautiful template ! Thank you!
Thank you for the template…I love it! So awesome of you to share it! ♥
Thanks fpr the great template!
merci pour ce très beau template
Thanks for the Tutorial etc. and also for the tuts and hints on how to simplify this wonderful process we call Digital Scrapping!!
I am hoping you can help me! I am so frustrated with trying to get my PSE 6.0 to work with templates. I am finding that when I download one they are all grouped together and locked? I don’t get the various layers so I can work with each layer. i have looked up numerous how tos, youtubes, etc., and it seems like I could follow your directions. I cannot seem to get this tutorial template. I joined? Its on my yahoo homepage. I am bored with the same old pages I am making and am really hoping to get inspired with ideas from you! Please help!