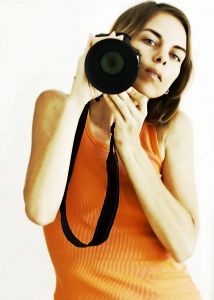
I don’t write a ton about photography and photo editing here, as I’m learning along with the rest of you. But I am busting at the seams with excitement about this topic right now. Why you ask? I just ordered my first digital SLR! Over the next few months, I’ll be sharing my experiences on transitioning from a six year old FujiFilm S5000 to the Canon XSi. As we go along, please let me know what you want to know about adding DSLR photography to your digital scrapbooking experience.
Since my camera doesn’t arrive until Friday (Thank you Amazon Prime), I’m keeping myself busy getting the laptop all ready for new photos. While I could use this as an excuse to buy Lightroom, I’m a big fan of working with the tools you have at hand. For me that is Adobe Bridge plus Photoshop Elements 6 for Mac with Adobe Camera RAW. Right now, my biggest concern is how to smoothly import, organize and initiate editing through Bridge.
The system I have right now is totally ad-hoc. I plug in my camera. Wait for the drive to appear. Drag photos to a new folder on my desktop. Browse with Bridge and go from there. I’m not leveraging any built-in functionality to make it easier. So, for this post, I set out to find a really helpful tutorial or two that would show me the ropes. Here’s what I found:
1. Better Workflow with Bridge CS4: A lengthy but tip-heavy narrative on using Bridge, compared with Aperture and Lightroom.
What I learned: You can use PSE’s batch processor from within Bridge, the software includes Adobe Photo Downloader for importing straight from the camera
2. Adobe Bridge Workflow: A fantastic free video tutorial on secret tips for getting the most out of Bridge
What I learned: How to rearrange Bridge’s interface, you can batch process actions, some keyboard shortcuts don’t work for PSE version of Bridge
[Interjection for RAW enthusiasts: While watching this video, I encountered another difference between the CS version of Bridge and the one included with PSE. The narrator says that edits made with ACR can be applied to subsequent, related photos with a simple right click. This functionality is just not there in my version. But that’s OK.
While testing out this functionality, I accidentally saved my .RAF (Fuji’s native format) file as a .DNG – Adobe’s native format and the closest thing there is to a true universal RAW file format.
I did a quick Google for DNG and came across this little post – Daddy, where do DNG files come from? In this article, I learned about the “Get photos from camera” functionality that includes on-the-fly conversion to DNG. The benefits? All edits to the file are store internally and not in an XMP sidecar file.
This was a lightbulb moment for me! I learned even more in #4 below!]
3. Bridge UI Nuggets: An entertaining video containing tips about commonly overlooked functions in Bridge.
What I learned: How to maintain filter preferences when browsing to a new folder
4. Bridge-Camera Workflow: A step-by-step video showcasing one comprehensive workflow
What I learned: An alternate way to convert to DNG, a method for ranking, how to batch process saving as a high-res jpg from within ACR
More Resources
- Your Complete Guide to Adobe Bridge: A narrative version of many of the tips and tricks offered in the videos above.
- The Russell Brown Show: Dozens of free videos to help you with Adobe products
Did you enjoy this post? Please consider taking one of the actions listed below.


Very informative post. This is exactly what I’ve been looking for.
Thanks!
Jennifer, I have the XSi and love it. Please share what you will be using for lenses. This is a great post about Bridge. I have been shooting RAW for two years and still picked up some new tips.
Cammy – I don’t think most will be surprised that, in addition to the kit lens, I purchased the 50mm f/1.8. I would have loved to be able to afford the f/1.4 but it just wasn’t in the budget – I also want to get a new couch from this tax refund.
I’ve never used a prime lens before, but I will say that I don’t zoom that much with my point & shoot now. I was pretty fortunate that the Fuji I have has all manual as an option – so I’ve been able to play some and start to understand better. I’ve been shooting in RAW almost exclusively for 6 months – processing gets faster and faster but I am still intimidated by all the photos I will take on vacation this summer.
I really enjoyed the video tutorials I found for this post and will keep trying to spot really helpful ones. I learn so much more from seeing someone do something vs. reading about it.