Last week my friend Stan from Scrapper’s Workshop shared some tips on saving your layouts for professional printing. This week I promised I would answer the second half of the reader’s question:
Secondly, I know that there is a way you’re supposed to save your layouts for posting on the internet, and I know how to do this, but is there a way to save that as a “setting†or an “action†so I don’t have to go through those steps each time?
The reader is correct, most of the free digital scrapbooking galleries require that you layouts be sized to 600×600 pixels and be smaller than 150K. While there are variations on this, generally speaking this is the norm. Here’s how I would do this manually (illustrated with PSE). It’s pretty easy, actually.
Saving files for digital scrapbooking galleries
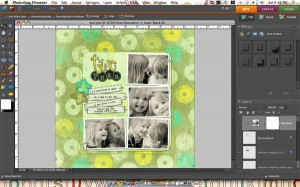
Step 1: Open the PSD file you wish to save to gallery size.
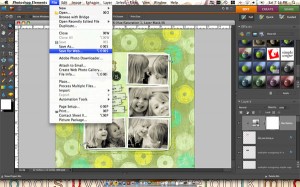
Step 2: Navigation to File > Save for Web.
Step 3: Select “Yes” on the pop-up.
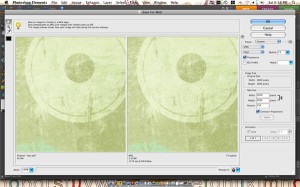
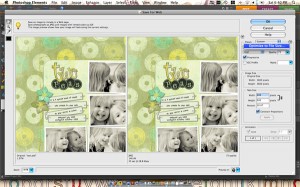
Step 4: You’re now in the Save for Web dialog box.
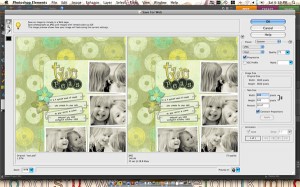
Step 5: In the Image Size area, change the size to 600×600 pixels. Click “Apply’.
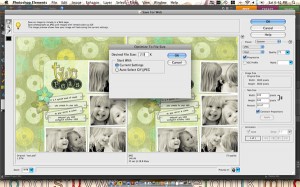
Step 6: In the top right, select the arrow and “Optimize to File Size”.
Step 7: Enter 150 in the box and hit “OK”.
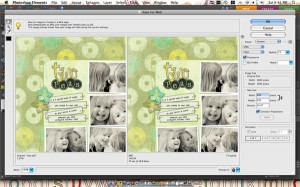
Step 8: You should see in the right panel that the file is now less than 150K in size. Select “OK”.
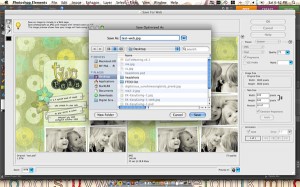
Step 9: Save your file with your desired location and file name.
A time-saving action
So, the answer to the reader’s question is yes and no. An action can be created to re-size your layout (we’ll assume 12″x12″). However, it is not possible to record an optimization of file size to 150K.
To make the manual method above even-easier, I’ve created an action (for Photoshop & PSE) that completes Steps 1-5 for you. It will leave you in the Save for Web dialog, where you’ll use Steps 6-9 to optimize the size and complete the save. I wish it could take you all the way, but I hope this helps a little!
Instructions for installing actions
How to find your action once installed in PSE
Actions are pretty straightforward in Photoshop, but can be tricky to locate in PSE. Here’s how you will find the Simple Scrapper – Save for Gallery Action:
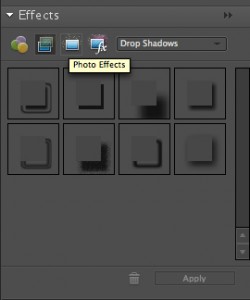
Step 1: In your Effects panel, click on Photo Effects.
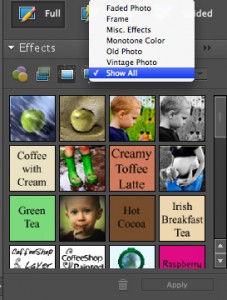
Step 2: In the drop-down box, select Show All.
Step 3: Scroll down until you see the Simple Scrapper icon.
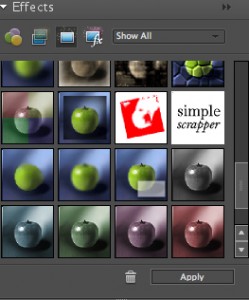
Step 4. With the original image open, click “Apply” to run.
Disclaimer: This action has been tested in Photoshop CS4 on a PC and PSE 6 on a Mac. It’s a pretty simple action, but please let me know if you have any issues with it and I’ll create an updated version.

I’m always up for giving credit where it’s due. I’ve been using and teaching Photoshop since version 2 – and I never knew you could change the pixel size in the Save for Web dialog box. I would always resize it in the main program, save for web, and then undo my resize. So much easier and simple doing it in the Save for Web box. Thanks for a true Simple Scrapper tip – I learned something new!
Stan at Scrappers Workshop
I’m so glad I could teach you something new!
My action actually uses your traditional method for re-sizing – even CS4 doesn’t enjoy recording the Save for Web dialog beyond opening it for you.
I never use Save for Web – and I’m not sure what the value of it is. My workflow is to save the .psd, resize to 600×600 (I don’t mess with the ppi box, that doesn’t matter) and save as .jpg (after adding SM to the filename so that I know it’s the small jpg). I’ve yet to have a gallery reject one of my layouts for being too large. It’s a much faster way to do it, IMHO. I’ll have to try doing it both ways (resize vs. save for web) and post both versions to see if I can see a quality difference on the screen. I’ll let you know what results I get!
I would assume that a version just re-sized (vs. re-sized and optimized to 150K) would certainly show a quality difference on-screen. I tested out a re-size plus saving at a quality of 10. This resulted in a ~300K .jpeg and was rejected when I tried to upload at DST.
I do agree there are tradeoffs. Save for Web allows you to do everything you need within one screen to get from your computer to a gallery, but re-sizing and saving normally (as you do) definitely preserves some contrast and saturation.
I’ve seen some girls recommend bringing a Save for Web’d image back into PS/PSE and using one of the blending modes to return the contrast and saturation to normal – but that’s an additional step.
To me, its not important that a gallery layout look as nice as one that I print, though I can see the benefit of uploading full-size layouts to a gallery like Flickr as a backup.
There are definitely many ways to accomplish this task. I’d like to hear how others simplify the process.
Wonderful tips today! I also didn’t know you could change the image size in the save for web dialog. Cool! I like the tip from Jenn White, too – just saving as .jpg.
Thanks for creating and sharing this useful action!
Jennifer! You rock and I just love the heck out of this blog!!!! I like the save for web option, as I think there is a reason it’s there. I, too, will try both ways and see which is better.
I am going to try and see what the difference in the size of the file would be using your way and the way Jenn W. mentioned. I am all about saving as much space as possible on my EHD…. although, I guess those images don’t even need to be saved at all once uploaded to your gallery(ies) or to photobucket, since you have the original file.
Nevertheless, Jennifer, you are so awesome and I cannot thank you enough for answering such great questions!!!! I learn so much here!!!
Thanks a million!
Candi
OH!!! And I totally forgot to say THANK YOU for the action, that’s awesoe, thank you soooo much!
Candice! You are so SMART! I don’t know WHY I save all those small jpgs. If I need one I can always resize it again. Or grab it from the gallery! DUH. Off to delete a bushel of pixels!!
That is a good point. When I need to upload a small size layout to another gallery, I usually hit up one of the places I’ve already uploaded it to.. instead of returning to the file. I think I might delete those myself!
OH. And I forgot to say, when I resize I save at a jpg compression setting of 5. That’s the lowest number where I don’t see a sizeable difference in quality. That gets me under 150k routinely – I’m guessing that’s what the Optimize for Web does – calculates the compression so that it fits the size you ask for.
Oh Jenn! You’re makin’ me blush!! LOL! I was thinking my comment was silly, but I am glad that it wasn’t!!! 🙂
This has been SUCH an informative post, thank you Jennifer!!! WE wub you!
Candi