Artsy does not have to be difficult. It can be simple and elegant, while still being perceived as being complex.

Anna Aspnes
Who doesn’t love a technique that makes both you and your scrapbooking page look good? I know I do.
The following 5 digital and artsy techniques will elevate the most ordinary of photos to more complex and artistic heights and can be employed by both digital and hybrid scrapbookers.
I will use the same photo to demonstrate the effectiveness and progression of each technique. Let’s start with the original photo, a hammy portrait of my two little people.
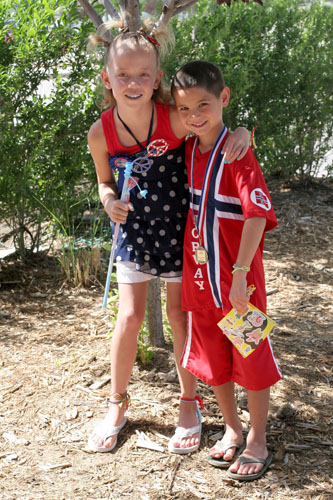
1. Embellish Photos using Brushes
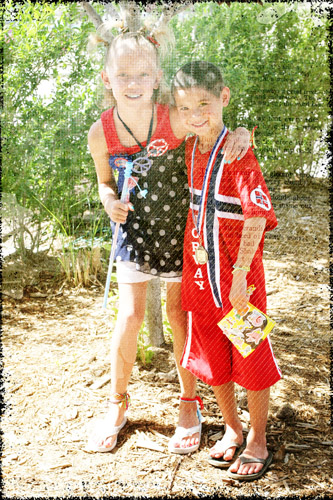
Brushes or BrushSets are the digital version of rubber stamps and ink in paper scrapbooking. They are usually delivered in both transparent .png file format and an .abr file which can be loaded into the Brushes Palette in Photoshop or Elements. Select the Paint Brush Tool from the Tools Palette in Photoshop or Elements which activates the brush options along the top of your workspace. Click on the small downward-facing arrow next to the brush image icon and select the black arrow (Photoshop) or the double white arrow (Elements) to access the <> option. Navigate to the saved location of the .abr file on your computer, select it, and click <>. Once you have loaded the brushes into the Brushes Palette, you select and stamp any of the brushes in the set onto your photo. Tip: Always create a new layer before adding any brushwork. The new layer can be easily deleted from the image, if at any point, you change your mind. I stamped black edges onto a new layer above the photo layer using ThinStrip Masks No. 2.
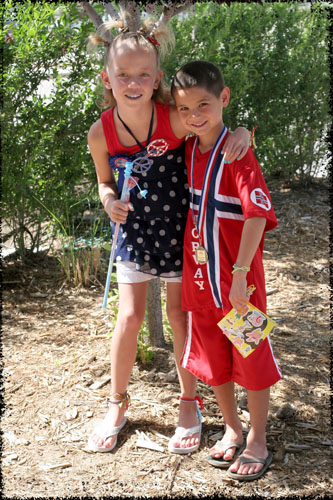
2. Blended Photos
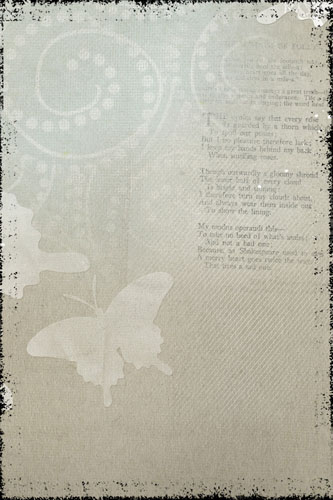
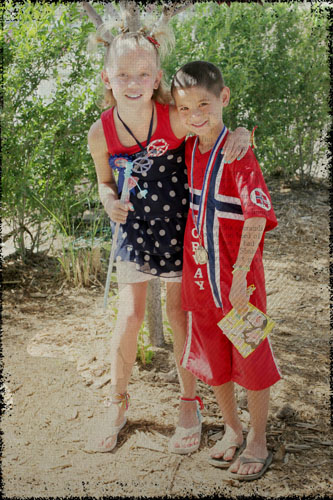
Create subtle interest and depth to your images by applying a Blending Mode to a photo over a textured paper or image. You could take a photo, scan an image or use a pre-made digital paper as options for your texture. Create a new 300DPI file in the same size as the photo you’re working with and open both the texture and photos images into your workspace. Select the Move Tool from the Tools palette and drag the texture over to the new file, followed by the photo. The photo layer should be on top of the texture layer in the Layers Palette. Select the photo layer and click on <> at the top of the Layers Palette to activate the Blending Modes drop-down menu. You can scroll through them using the up and down arrow buttons on your keyboard to find the one you like the best. Blending modes allow the underlying texture layer to partially show through the photo layer, therefore creating a blended image. The effect achieved for each blending mode is dependent on the unique relationship between each photo and texture combination. Tip: Try duplicating the photo layer or adjusting the brightness and contrast in the photo to tweak the effects of any blending mode. Below you can see the original texture followed by the application of the Multiply, Color Burn and Overlay blending modes (in order of appearance) to the photo layer.

3. Create a Lens Flare
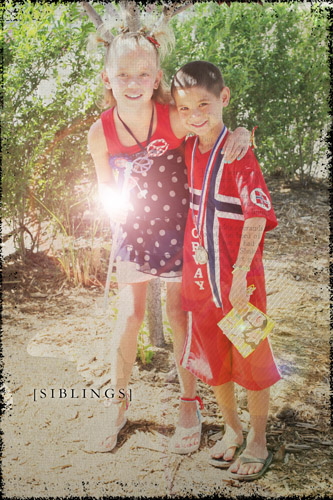
Use the Lens Flare Filter in Photoshop or Elements to add custom lens flares to your images. Create a new 12 X 12 300DPI file and fill with gray color. Go to Edit> Fill, and select 50% gray from the drop-down menu. From the Filters menu, go to Render> Lens Flare. Ensure the <> option is checked and click <>. Select the Move Tool from the Tools Palette and drag the lens flare layer on top of the photo layer. Select <> from the Blending Mode options in the Layers palette and resize the flare so that it works with the proportions of your photo. In applying the Hard Light Blending mode the gray background becomes transparent and only the lens flare remains. Tip: When you are comfortable with this technique you can play with the other len flare options, adjust the brightness and experiment with creating different sized lens flares. In my photo, I resized the lens flare and postioned it so that it appears to be bouncing off my daughter’s hand.

4. Customize with Text
Add text directly to your photo using the Text tool in Photoshop or Elements. The text used could be a single descriptive word or a group of words in the form of a quote. The words can be large or small. Select the Type Tool from the Tools Palette. Create a Text Box by clicking onto the photo with the left mouse button depressed. Drag diagonally from one corner to another releasing the left mouse button to define the parameters of the Text Box and begin typing or copy your text into the define area. You can also experiment with the font type, color, spacing of the letters and orientation of your text to achieve multiple text effects. Tip: You might also consider applying a Layer Style, such as an Outer Glow or a Drop shadow to your text, to create some visual separation between the words and your image background.
5. Easy Masked Images
Clip a photo to a mask using the clipping mask function in Photoshop or Elements. Create a new 300DPI file in a size that is larger than your photo and fill with black or white. Open the mask to which you would like to clip you photo and drag onto the new file along with the photo using the Move Tool from the Tools Palette. The photo layer should reside above the clipping mask layer in the Layers Palette. Press CTRL+ALT+G (Photoshop) or CTRL+G (Elements) to clip the photo to the mask. This action essentially forces the photo to conform to the shape of the underlying mask as though it has been cropped. Crop the clipped image using the Crop Tool located in the Tools Palette. I created a 12 X 12 300DPI file with a black background, and clipped my photo to a mask from Layered FotoBlendz No. 6, before cropping it to a standard 4X6 printable size which could be used on either a digital or hybrid layout. Tip: Make sure the photo you are using overlaps the mask that you intend to use to ensure full coverage.
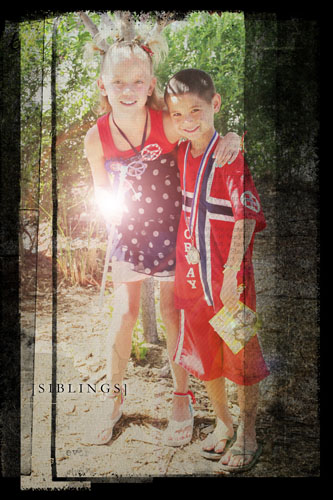
Notice how easily we turned a basic photo into an artsier and more complex rendition simply by combining 5 simple digital techniques? Try mastering each technique individually, and then “stack” the techniques in different combinations, by using two or more of them in succession, to create multiple artsy photo effects.
Anna Aspnes is a UK native and military wife living in Colorado with her husband and two children, Ella and Luke. She is currently an independent digital designer, creates digital albums and slideshows for Smilebox, and is a member of both Shutterfly’s Scrapbooking Advisory Team and Wacom’s Penscrappers Panel. Most recently, she’s been chatting about her passion for modern memory-keeping on the The DigiShow. Formerly a contributing editor for Digital Scrapbooking Magazine, her layouts, designs and articles have been published in a variety of scrapbooking publications such as Creating Keepsakes and the former Simple Scrapbooks. You can find Anna at www.annaaspnesdesigns.com and twitter: http://twitter.com/annaaspnes.


These are some really great ideas for making Photos stand out! I will try and incorporate some of these into some of my layouts! Thanks for the ideas!
Thank you for sharing these techniques. I’m off to try them right now.
Would lvoe to see what you came up with Susie.
That would be “love”
Thank you, Anna….this is great!
Great concise tutorial of techniques (and thanks for explaining them in PSE, too)! I’ve tried the last two but the other techniques I forgot how to do – thanks for putting such easy to follow descriptions together – now I can figure out what to do with all those brushes I’ve been collecting!
Glad you liked it Cindy!
This is all so foreign to me I appreciate the tutorials! I have often wanted to add some kind of brush around my photos (even just for my blog) but didn’t how… Thanks!
I did not know I could make my own flares! Now I do…must go try right now!
Fantastic tips with easy to follow instructions, thanks Anna!
Great techniques for adding that “special something” to photo’s. Thanks Anna.
I have been looking in awe at your complex (and truly artsy) layouts for several months now. I’m still awed, but it’s exciting to have a few of your techniques laid out so simply and systematically. This is only one image; I wish you would lay out your process for an entire page sometime!
Hi Nancy, I have a few video tutorials on my blog . Also check the Layouts Deconstructed category. I will be doing more educational modules with video and written content for my new store which opens at Oscraps next month.
It’s fun to see how the little changes add up!
Thank you for the fabulous tips! I think maybe there are some things missing in parts of the text…at some points it shows only for me when you are explaining what option to choose…or maybe its just not displaying for me 🙂
Which parts are you missing Lisa?
These are so ANNA. They are great and thanks for sharing them!
Ok seriously motivated to go and play with some photos, thanks for sharing these wonderful ideas!
Great Tips. Thanks for sharing, Anna.
thanks anna. love love love your art. really appreciate you sharing some of your process.
So true! Thanks to technology, we can now make those ho-hum photos into oh-some ones! Thanks for the additional tips, Anna!
“we can now make those ho-hum photos into oh-some ones!”\
LOL! Love that.
Wow, what a transformation! I love adding texture to my photos, but your ideas have inspired me to go further! I love masking tip! Thanks.
I really love the flare idea! I will definitely try that one out. The one that intimidates me most is the textured overlay. Whenever I try it, it ends up looking way too textured. Thanks for including directions on how to achieved the look…I will try it your way and hopefully it will work! Thanks for sharing!
Try reducing the opacity of the texture layer or adjusting the Levels to brighten the image. You can also try brihgtening the overlaying image.
I love Anna’s designs and really appreciate the 5 simpler techniques that I can attempt! Thanks, Anna.
Glad you liked it DeeAnn
Thanks for the tips! Can’t wait to try them!
Learned something new. Love your thin strips used as an edge, so many fun uses with them. Will have to try this later today. Thanks Anna.
I wish I knew all the stuff you do, Anna! Always perfect! Thanks so much!!
Looking forward to teaching you more Carol.
My son just walked in and saw the lens flare photo- he thought it looked cool because it looks like the wand is lit up and doing magic. 🙂
Thanks, Anna – you make everything seem so easy –
Hope we see more of your teaching!!
I love reading and hearing Anna’s perspective on things. Thanks for sharing!
Such creative techniques for adding artistic flare to photos. I have never tried to add an overlay to a photo before but feel inspired to try it now thanks to Anna’s instructions and inspiring photo.
Post a link. Would be awesome to see what you come up with.
Great tut. Thank you so much! Can’t wait to try it.
Love Anna, and this post gave me ideas for a specific photo. The very first photo of my husband (of almost 20 yrs now) and I back when we were teens. It’s a crappy photo but has so much meaning to me now. I wanted to frame it for our room—and looking at Anna’s final product above, I think being creative with layers and making it more artsy will be a way to distract from the original low quality of the photo.
Great way to focus on the story instead of the photographic quality.
Totally! You have to love the power of Photoshop for improving the look of low quality photos.
Thanks for sharing these cool techniques, I’m always happy to learn something new!
I love Anna Aspnes brushes and use the hipster ones all the time. These are great ideas. I sometimes add little speech bubbles to the photos because the kids just love it when I do so.
They are so ” in vogue” right now also.
What a beautiful result (mind you the original is lovely too!). I really need to get some photo editing software and start playing. I know where to come for good tips!