Scrapbooking kits are by no means new, but recent years have seen the rise in popularity of mail-order kit clubs. Coupled with kits being the go-to delivery format for digital designers to sell their work, these curated collections of creative supplies are very much mainstream.
In last week’s Simple Scrapper Live I discussed the pros and cons of breaking up kits into their respective categories vs. storing each kit as a coordinated unit. I also shared the approach I’ve settled on after testing out the full spectrum of options. (Hint: It’s the simple solution.)
I’ve embedded the video here, in case you haven’t already watched the new episode.
This post extends this conversation and is for scrapbookers who love to keep their kits together long-term or just want an interim storage solution. I’m focusing primarily on tangible scrapbook supplies, but I’ve also included some specific tips for digital scrapbookers as well as many universal ideas.
With every organization project I start with the question “How will I reach for this type of item?” I think about what I search for when creating, the proximity these items should be to my work space, whether they need to be easily visible, and how much tolerance I have for browsing.
Storage Options for Physical Kits
I have personally tried most of these options for storing my scrapbook kits. There are pros and cons to each.
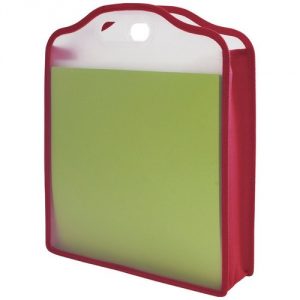
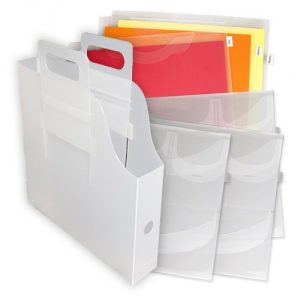
1. Storage Bags and Totes, Vertically – This is my preferred approach, because I like to easily browse through options. Some kits now come in storage bags, such as those from Studio Calico, but there are a variety of retail options. Typically you’ll see these advertised for 12×12 paper storage. I’ve also seen jumbo ziplock bags used, especially for short-term transport to crops.
Storage Studios – Paper Folio
This 3″ expandable tote could hold multiple kits or one mega kit.
Totally Tiffany – Paper Manager Kit
This tote with included inserts could storage multiple kits with flat embellishments.
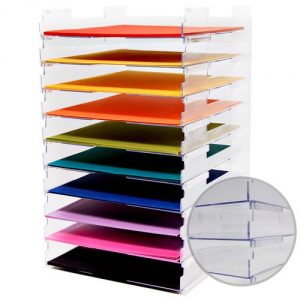
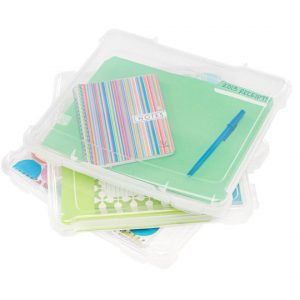
2. Paper Trays, Horizontally – I use these trays from Umbrella Crafts for micro kits that I assemble for a single layout. Horizontal trays help you limit the number of stored kits and also have them easily accessible.
Umbrella Crafts – 12×12 Stackable Paper Trays
I have my trays stacked 6-high side-by-side to easily fit in my shelving unit.
3. Iris Boxes, Horizontally – I’ve only used the larger versions of these cases myself, but this solution is by far one of the most popular.
Slim Project Case
At just 1.6″ thick, these sturdy cases are just right for keeping your kits together, visible, and portable.
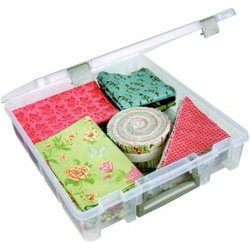
Art Bin – Super Satchel
This 3.5″ variation by Art Bin has a handle and is perfect for storing a particularly large kit.
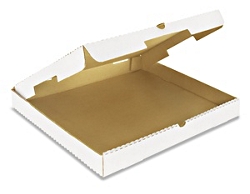
4. Pizza Boxes, Horizontally – Many scrapbook kits are shipped in 14″x14″ boxes that open like a pizza box. These can be handy for ongoing storage on shelves or in a closet, especially if they are labeled with the kit name and date. I’ve even seen scrapbookers use actual (clean) pizza boxes because they are so handy.
14″ x 14″ x 2″ Pizza Boxes from ULINE
At just $31 for a case of 50 boxes, this is an economical and reusable solution for ongoing storage of scrapbook kits.
Storage Options for Digital Kits
I recommend storing your digital kits unzipped and with a consistent naming structure that you understand. You’ll want at least one folder, depending on the number of kits you have and whether you’ll be using any software to browse your supplies.
1. Folders – Storage of digital kits doesn’t have to be complicated. Keeping all your kits together (each with its own folder) and nested within another folder is the best starting point. You don’t want to be hunting for files in different places across your computer or external drives. This tutorial by Traci Reed for Sweet Shoppe Designs offers some additional discussion on using folders to organize digital scrapbook supplies.
2. Folders + Software – Modern computer operating systems allow you to visually browse the contents of a folder, but software can add a layer of ease to browse files across multiple sub-folders. This article from Scrapaneers is outdated (Picasa is no longer supported by Google), but offers some of the pros and cons of various software choices.
Organization Strategies for Kits
Within each storage solution, there are additional options for organizing your scrapbook kits. It is recommended to choose an option for ordering the kits based on what you think about when browsing. Do you consider the manufacturer, how recently you purchased the kit, or the color palette?
1. By Manufacturer – The “manufacturer” here could be a collection’s brand name (e.g. Crate Paper) or the curator of the kit (e.g. Citrus Twist Kits). If you purchase kits from multiple places, you might want to keep them together by that source.
2. By Date Purchased – If using your oldest supplies first is a key driver of your decision-making, storing kits by date might make the most sense for you. Know that it’s OK to follow your brain’s natural patterns, even if others organizing things differently.
3. By Color Palette – For some scrapbookers, coordinating the color or mood of a kit with the photos on hand is the predominant thought. If you commonly search for supplies by color, storing your kits in this manner might make sense for you.
Like nearly every aspect of this hobby, storage and organization of scrapbook supplies is ultimately a very personal decision. We all think and work differently, so experimentation and thoughtful planning are needed to make sure your chosen solution is a perfect fit.
How do you organize and store your scrapbook kits? Share your approach, and others you have tried, in the comments.



Jennifer, thanks for this post! It comes at a strategic time for me as I completely redo my storage to accommodate new product and purge things I never want to use again!! The one item missing from your post, that I rely on most of the time, is THEME. That’s why I buy and how I store my kits now. I no longer buy as many kits just because because they are cute! I even put a sticky note on the kit/paper as soon as I get it paid for, that reminds me what the kit or paper is for. Then I store in whatever is best, usually expandable folders with pockets for accessories. Then I store horizontally, the kits (homemade or store bought) in a theme drawer. Kits I do buy that aren’t for a specific theme, are stored vertically in the same kind of folders, by the main color, in a plastic tub!
Awesome post, thank you so much for sharing
I use and love PSE Organizer, for digital kits, I just unzip the kits as is, and then I can browse by designer via the PSE folder view, use a saved search to find my kit previews, use the color searching feature or just scroll through all the kits in the main media view. I love that I don’t really have to do anything more than unzip the files!
For my physical project life kits, I’ve used 6×4 photoboxes (the kind that come in a set of 12 in a larger box) and kept just 1-2 of each card from a core kit in there. So I have quick access to multiple kits for layouts and I just restock them from my original core kit boxes if needed. In truth, I’ve mostly sold off the excess PL cards as I know I won’t use a whole core kit.
Thank you for sharing. It turns out that pizza boxes can also be used to store stickers. These pizza boxes can be reused next time.